
My name is Jude, I’m a Security Analyst working with a Security Operations Center (SOC) team based in Australia. Outside of the usual SOC tasks (alert management, detection use cases), I work on specialist engagements around analyzing and understanding the external attack surface of companies using OSINT investigation and Dark Web Monitoring. One of the tools I use most is SpiderFoot, because it allows us to integrate a number of sources into one easy platform to work from and protect clients from vulnerabilities and data exposure on the web.
In the world of cyber security, a lot of money, time and resources are put towards preventing what could arguably be described as the inevitable – compromise. Businesses manage risk, and part of that risk includes what happens when the company is inevitably breached by a malicious actor. In my line of work, this is often where I come in to engage in the DFIR (Digital Forensics & Incident Response) process.
Malicious actors spend a lot of time attempting to gain access to an environment, and this is often what analysts and engineers working in a SOC or security team spend a lot of time trying to detect, but it doesn’t always work. Humans are inherently flawed, and social engineering attacks, such as phishing, often lead to Business Email Compromise (BEC).
OSINT can be used in DFIR engagements to learn more about the malicious actor and who’s “behind the screen”. In many cases this isn’t exactly a fruitful exercise, or one that’s necessary, but key stakeholders often want to know more about this to determine the full timeline and establish motive. Understanding more about the actor might also provide insight into potential future attacks, or support in correlating two seemingly unrelated attacks. Unfortunately, learning more about the attacker and even their identity does not often lead to any kind of legal repercussions for them, but nonetheless in this guide I will delve into how I use OSINT to learn more about the adversary.
Analyzing the Intrusion Timeline
A number of months ago, I dealt with an incident involving a malicious actor gaining access to the environment via a user’s account. I’ll skip the details on this, but they were able to use social engineering to gain access and began the usual activity you’d expect with a BEC (Business Email Compromise) incident – inbox rules to redirect responses to their scams, collecting email data, etc. At this stage the IOCs I had to work with were the logins from this adversary, and some information from the phishing emails they had sent out.
I ran a preliminary scan in SpiderFoot HX on these indicators in order to learn a bit more about this adversary. They were using IPs on anonymous infrastructure for the most part, but these malicious actors are human, and humans make mistakes.
Scanning for more IOCs
The initial scan ran with just the IPs I found from logon events. I’ll go into detail on the phishing artifacts a little later, but let’s look at what we have so far:

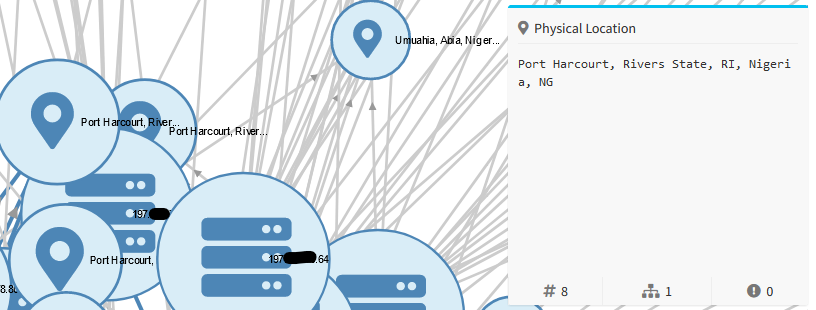
Most of the IPs were VPNs, particularly free or ‘no log policy’ VPNs which is to be expected from a malicious activity – the main goal is anonymity with crime, I suppose. However, as suspected, the attacker didn’t use a VPN in a couple of instances seemingly by accident, and we can see logins from a mobile IP in their source country. These IPs have no anonymous infrastructure, are local mobile telecommunications companies, and would likely be the user’s location:
The scan found a number of interesting services on the same subnet as these IPs, including open remote desktop ports, but unfortunately not from the IPs we’ve provided, but the number of malicious detections and services we’ve seen indicate that either this adversary, or a number of adversaries are operating from this network.

So what can we do with this information? In the context of DFIR, ‘lessons learned’ is a key part of the process that often involves improving threat intelligence and conducting threat hunts to ensure future breaches are caught and contained. We can add these IPs to threat feeds to improve detection strategies for SIEM clients, and enable faster reaction to any future attempts to access the environment from this adversary, or potential new ones from this network. We can also pivot from these IPs and conduct threat hunts to determine if the attacker attempted access via other users, successful or otherwise, and put together a profile of who may have been initially phished. This can be further confirmed with log sources such as web, DNS, etc.
The Attack Strategy
Let’s talk about the phishing page and emails. The adversary sent out a large number of pretty standard phishing emails from the compromised account once they caught onto the fact they had been made, and they consisted of a standard call to action e.g. review this file, and the notorious hyperlinked landing page.
Without going into detail and revealing sensitive information, the link and landing page was oddly constructed, and we determined it was designed for another company and simply repurposed for this one. One of the smarter tactics these pages use nowadays is grabbing the favicon of the domain from the target user’s email, and adding this into the webpage to make it seem more ‘official’. This is a pretty rudimentary strategy but it works well enough for them.
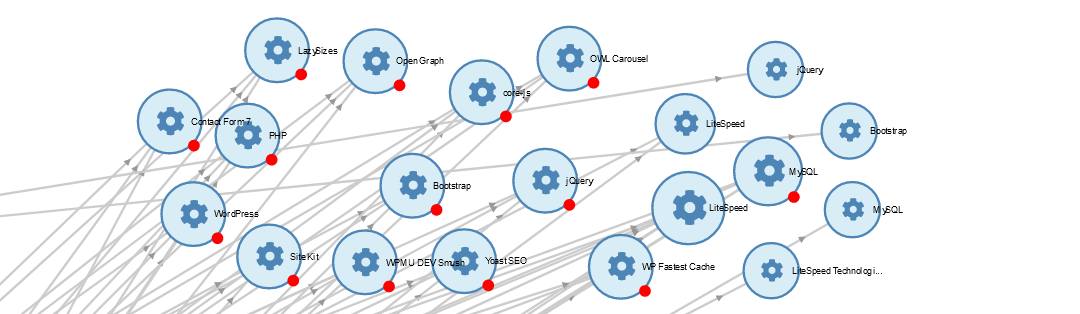
Running another SpiderFoot scan, this time on the domain, I discovered that this site is merely compromised, and not set up by the attacker. There are many blacklisted entities related to it now (likely thanks to many reports from a number of organizations), and most of the content on the site is legitimate, based on the services and the homepage (for their sake):
Attempting to sandbox the phishing page at the time resulted in the target PHP files being wiped by the adversary. The page had an open directory where I could see a few other files that I decided to analyze to see if I could find the C2/exfiltration IP where the credentials were going.

The PHP code revealed some interesting information about how it operated, but unfortunately the key files I needed including the logs and the landing page were wiped, so I sadly hit a dead end here. The last thing I did to learn a bit more about the adversary was a little unexpected:
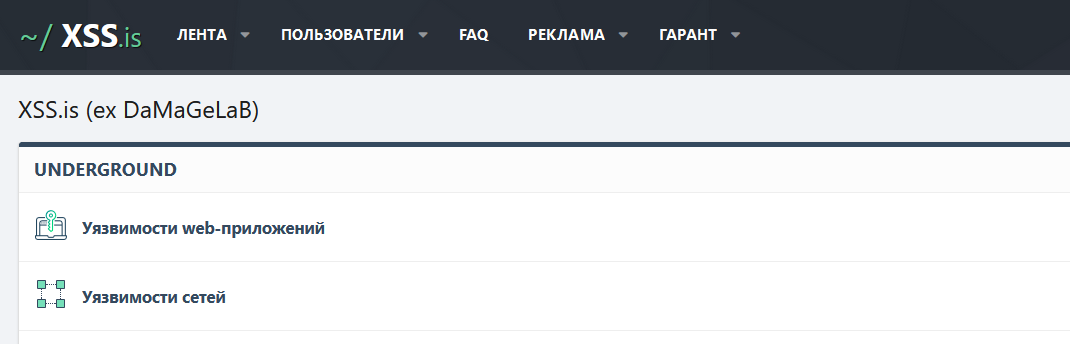
As part of my job, I frequent various underground hacking/scam sites, many being Russian language, and I came across someone selling 365 email leads. A short telegram conversation later, I learned that they had a number of leads that matched the client, and I realized this was the individual. Not exactly information I can work with, but it was nice to know I traced the individual to the source, and could provide better information about what this adversary’s end goal was after they realized we were onto them.
Key Takeaways
Social engineering is one of the most common ways an organization is compromised, no matter how many systems, policies and practices we put in place to secure users. Humans make mistakes, have bad days, and fall for scams – especially when they aren’t properly trained. Training users in your organization can go a long way to preventing this kind of thing from happening, especially on spotting scams as well as implementing secure policies around access to the environment from overseas.
SpiderFoot enabled me to bring much greater context to the situation and determine the attacker’s location, and motives. While it’s not always accurate, an adversary’s location can give you clues about the kind of person or group you’re up against. If you can track the user back to Russia, China, or perhaps North Korea, you could have a bigger, more complex attack on your hands. Lastly, finding all of these additional artifacts enables them to be put to use in threat intelligence feeds to improve future detections, and level up the threat hunting capabilities within the organization.


